1. Begin working by creating a new file (File>New) of 854×854 px and 72 dpi. Use on it theEllipse Tool (U) to represent the basis for the logotype to be of the Google Chrome browser.
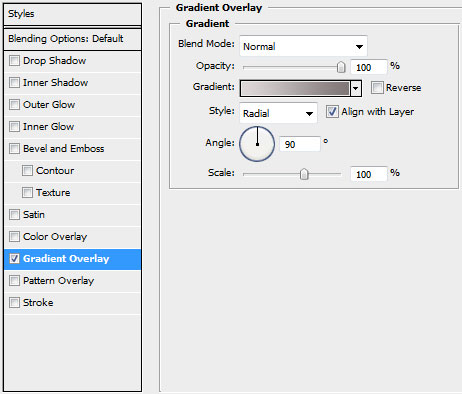
2. Select for this layer the parameters from below by making a mouse click on this layer on the layers’ panel:Blending Options>Gradient Overlay
3. Using the same tool, try to make the next layer of the same element. Firstly apply the Ellipse Tool (U) to mark out the outside edges of the layer and then choose the Pen Tool (P) to cut out an inside opening. Its shape may be corrected with the Convert Point Tool.
4. The layer’s parameters: Blending Options>Bevel and Emboss
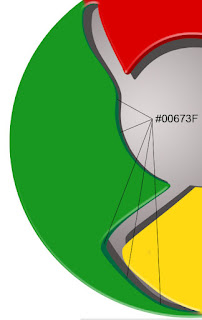
5. Make a copy of the recently made layer and use on it the Free Transform option. Press Maintain aspect ratioand make uniformly the copy smaller and then displace it easily. Move off the layer’s effect out of the copy. Select also the color #4E4A4A for the layer’s copy. Place the new layer under the previous one. This will be the shadow’s layer.
6. Create a new layer and use on it a standard brush (Brush Tool (B)) to paint the logotype’s sectors. Press preliminary Alt button and make a mouse click between the top logotype’s layer and the new one.
7. Make a new copy of the logotype’s layer and apply the Bevel and Emboss options for the copy. Use the Convert Point Tool to change the placement of the tops and move off the layer’s effect. Place this new layer lower than the logotype’s layer with the effect (Bevel and Emboss), but above the layer containing the logotype’s shadow.

8. Create a new layer again situating it above the previous made one and do the same operations we did when painting the top layer (meaning the layer situated above the shadow’s layer, but lower than the logotype’s one).


No comments:
Post a Comment